
How to Make Backgrounds For Your At Home Content
With many of us stuck in the house, it’s getting more and more difficult to get creative when it comes to shooting content. We only have so many walls in our homes. I’ve had this little trick I use for specific things and now I have been using them for my photos. The best part, you can make quite a few different backgrounds for just $10.
Here’s what you can do to overcome the wall you’re bored of…
What you need:
Project Board(s) tri-fold or flat (your preference)
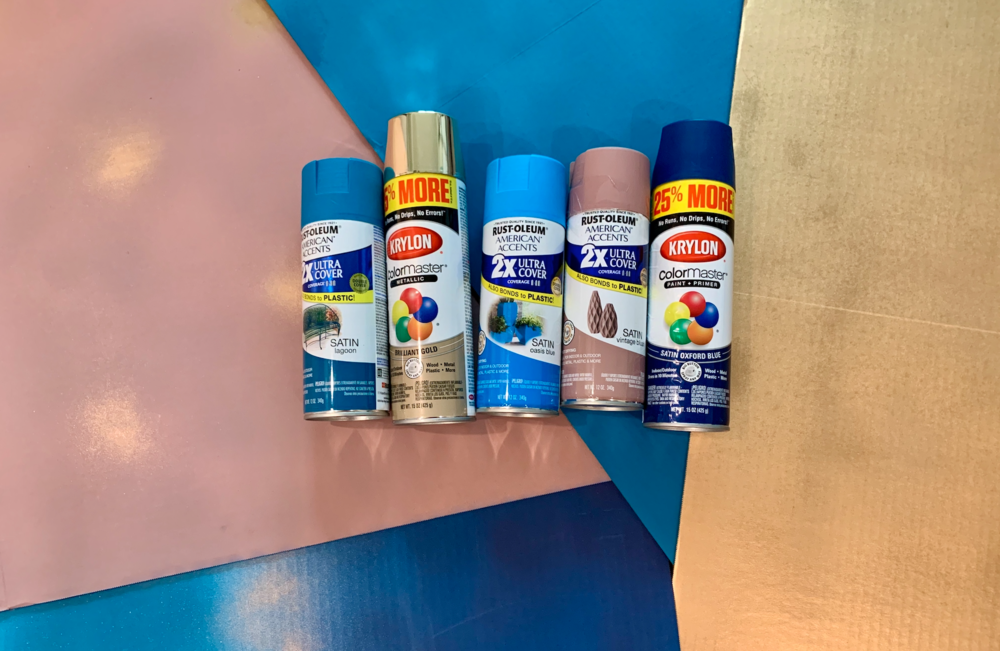
Spray Paint(s)
Newspaper or trash bags
Open space that is well ventilated
All of these can be easily found at Target, Walmart and Amazon.
You can do a solid color, make different designs, make a gradient etc. whatever you can think of, you can do it. It’s really that simple. These backgrounds can be used heretically and horizontally. I usually use thumbtacks to keep them in place when needed. Most times, I can get the board to stand on its own behind me.
Process:
Layout your newspaper or trash bags
Place the project board on top with the white site facing up.
Now start spray painting.
Let your board(s) dry overnight.
*If you are doing multiple colors such as one on top fo the other, allow each color to dry a bit, before using the next color. If you are trying to accomplish a gradient look, go ahead and do all of the colors without waiting for each color to dry.
The use for these backgrounds isn’t limited to just photos of yourself. I have used these backgrounds for photos of clients, zoom meetings, product shots for my Grab and Go Camera Equipment blog post. I know the color rolls exist, but those can be pricey when buying multiple colors and you are limited to one color, you can’t get different designs like I have done. Check out the ones I made awhile ago with my friend Darlynn, below.

This is a gradient effect we did. You spray more color in and areas and then lightly spray where you want the gradients to meet. Then we splatted some gold over it. This is my personal favorite board. The lines annoy me a little which is why I’m going to make flat boards next.
This was made with the base color first, we let it dry and then applied the gold splashes.

The outcome from the gold background. I didn’t want the blue strip, so I made sure it was cropped out when the photo was taken. This background was plated vertically.
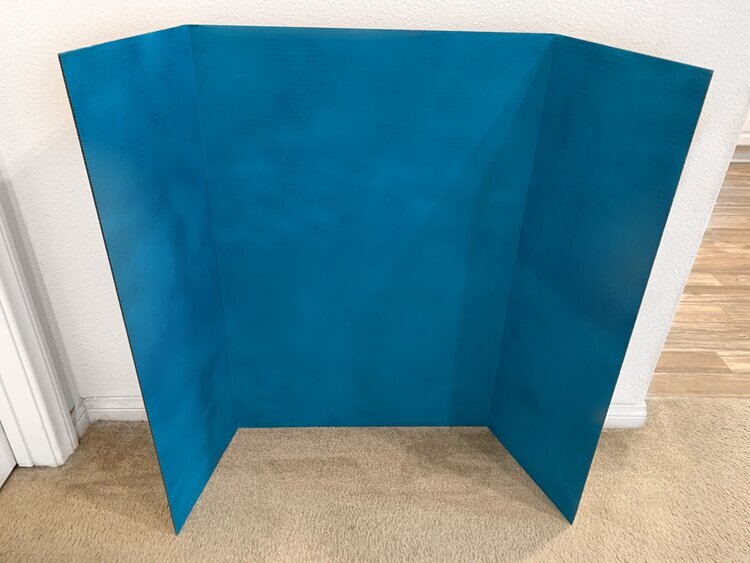
A solid color background.

This required a bit more work. We had to apply tape to create that straight line and cover the area that wasn’t supposed to be spray painted. Upon finishing one color, we let it dry and then covered the painted area and spray painted the second color.